Can You Hatch Quail Eggs at Home? We Show You 7 Simple Steps!

Thinking of how you can hatch quail eggs? It’s easier than you think! You can hatch your own quail chicks right at home with an incubator.
But How to Hatch Quail Eggs? The process involves carefully incubating the eggs for around 17-18 days. You’ll need an incubator to provide the right temperature and humidity. First, set the incubator to 99.5°F with 45-55% humidity. Also, eggs must also be turned regularly until a few days before hatching.
With proper care, they grow quickly and are ready to move to a brooder within a day or two. By following these simple steps, you can successfully hatch quail eggs and enjoy the benefits they bring. Let’s have a glance at all the steps!
Table of Contents
7 Step-by-Step Guide to Hatching Quail Eggs
So, are you ready to take my advice? If so, get set for a successful quail egg-hatching process. I’ll guide you from day one to after-hatching care, ensuring your journey is smooth and rewarding.
Step 1: Gathering Supplies
Before starting your quail-hatching adventure, it’s essential to gather all the necessary supplies. So, what do you need to hatch quail eggs?
- An incubator with automatic turning trays is a must-have.
- You’ll also need an egg candler to check the fertility and development of the eggs.
- Don’t forget to prepare a brooder box and heat lamp for the newborn chicks.
- A thermometer and hygrometer will help you monitor temperature and humidity accurately.
- Other items include egg trays, paper towels, and disinfectant.
Step 2: Selecting and Preparing Eggs
Choosing the right eggs is crucial. Look for fresh, fertilized quail eggs that are clean and unblemished. Mark the eggs with a pencil to keep track of turning. Before placing them in the incubator, store the eggs pointy end down at 55-65°F for up to 10 days.
On the day you plan to set the eggs, warm them to room temperature and disinfect them thoroughly.
Step 3. Pre-incubation Quail Egg Care
Just before you set your incubator, here’s what you should follow –
- Collect eggs frequently and store them at 15°C (not in a fridge).
- Handle eggs carefully to avoid cracks, which harm hatching.
- Clean and disinfect the incubator to prevent contamination.
- Use sandpaper, not water, to clean dirty eggs before incubation.
- Fumigate eggs after collection or within 12 hours of placing them in the incubator (except for 2-5 day-old embryos). Specific instructions for fumigation are provided.
Related Articles:
Step 4: Setting Up the Incubator
Proper incubator setup is key. Set the temperature to 99.5-100°F and maintain humidity between 50-65%. Add water to the reservoir and warm the incubator for 4-6 hours before adding the eggs.
Once the temperature and humidity stabilize, place the eggs horizontally on the turning racks, ensuring adequate airflow.
Step 5: Incubating the Eggs
During incubation, try not to open the incubator frequently to avoid disrupting the environment.
Here, you’ll have to let the automatic turner rotate the eggs every 1-3 hours. Candle the eggs in a dark room on days 7, 14, and 17 to check growth and development. Discard any clear or rotten eggs, keeping only those with visible veins and embryos.
Maintain the temperature and humidity levels diligently.
Now, you may think, how to hatch quail eggs without an incubator, right?
Hatching quail eggs without an incubator is much trickier and has lower success rates. However, here’s what you’d need:
- Broody Hen: A mother hen willing to sit on the eggs for 18 days.
- Warm, Stable Environment: Mimic incubator temperature (around 99.5°F) with a safe heat source.
- High Humidity: Regularly misting or using a damp cloth can help maintain moisture.
- Turning Eggs Manually: Mimic turning 4-6 times a day.
If you don’t have an incubator and want to hatch eggs, the following video will help you out!
Important Note: This method requires constant monitoring and adjustments. It’s generally recommended to use an incubator for better chances of successful hatching.
Step 6: Preparing for Hatching
Around days 14-15, stop turning the eggs and move them to the hatching tray. Increase humidity to 65-70% to aid the hatching process. Look for pipping (holes in the eggshells) around days 17-18.
Once the first chick hatches, leave unhatched eggs undisturbed for 24 hours.
Step 7: Caring for Newborn Quail
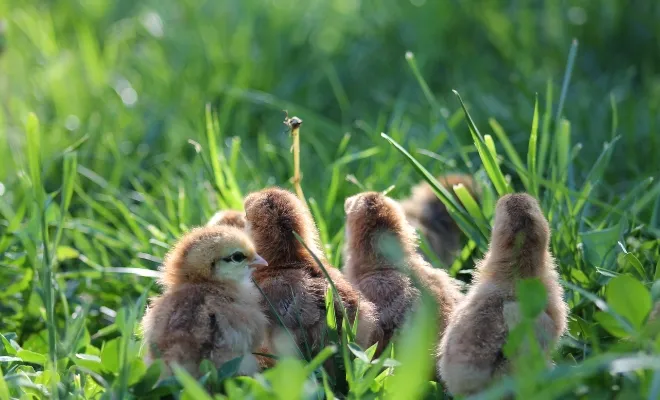
Within 24 hours of hatching, move the chicks to the prepared brooder. Provide a heat source set to 95°F, and offer chick starter feed and water. Handle the chicks minimally to avoid stress. Gradually decrease the brooder temperature by a few degrees each week.
Don’t forget to watch for issues like pasty butt, splayed leg, or signs of dehydration. With proper care, you’ll soon have a thriving flock of quail hatchlings!
Take some advice from the following video to hatch quail eggs.
FAQs
Curious to learn more about hatching quail eggs? Check out this Q&A part with valuable insights!
Q. Will quail hatch their own eggs?
No, quail cannot hatch their own eggs without a broody hen or incubator.
Q. How long can quail eggs survive without heat?
Quail eggs survive without heat for a short time (a few days) but won’t develop chicks.
Q. Are quail easy to hatch?
Quail eggs are considered easier to hatch than chicken eggs. It’s due to their smaller size and shorter incubation period.
Q. How to tell if a quail egg is fertile?
Candling (shining a light) helps determine if a quail egg is fertile (shows development) around day 5-7.
Q. Do quails lay unfertilized eggs?
Yes, quail hens can lay unfertilized eggs, but these won’t hatch chicks.
Q. Will quail lay without a male?
Yes, quail will lay eggs even without a male present. However, the eggs will be infertile and won’t develop chicks.
Summary
Hatching quail eggs at home is simple and rewarding. With the right supplies and careful monitoring, you can successfully hatch quail chicks. Following the six steps ensures a smooth process from incubation to caring for newborns.
Enjoy the benefits of raising quail, from fresh eggs to healthy birds. With proper care, your quail will thrive, providing a wonderful addition to your home or farm.


