9 Guides to Grow Microgreens for Your Chicken Coop at Home

Microgreens for chickens are tiny, nutrient-packed plants harvested just after their first leaves appear. These mini-greens can be a game-changer for your chickens as they’re packed with vitamins and minerals!
Growing microgreens is simple and rewarding. With basic supplies like trays, soil, and seeds, you can produce fresh greens in just 1-2 weeks. The process is straightforward: plant, water, and harvest. You can also feed them as a treat or mix them into regular feed. The best varieties include wheatgrass, sunflower shoots, pea shoots, and radish greens.
Stuck here to know the process of growing such greens? Let’s dive in to learn how to grow microgreens and feed properly to chickens!
Table of Contents
How to Grow Microgreens for Chickens? A 9 Step-by-step Guide
You want to grow greens to make your chickens happy, right? Well, you’re in the right place! Let me guide you on how to grow microgreens for your chickens.
Step 1. Choose Your Seeds
First, choose your seeds carefully. Opt for varieties safe for chickens, like wheatgrass, sunflower, pea shoots, radish, and broccoli. Make sure the seeds are untreated and meant for cheap sprouting or microgreen production.
I recommend buying organic seeds to avoid pesticide residues. Always buy from reputable suppliers to ensure good seed quality and viability.
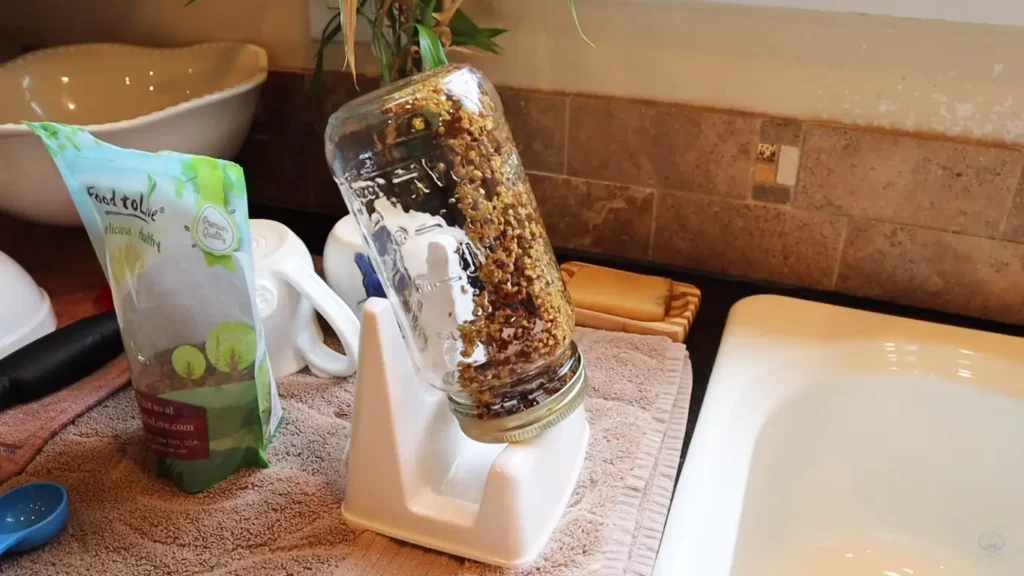
Step 2. Gather Your Supplies
Next, gather your supplies.
You’ll need shallow trays, preferably made of food-grade plastic or metal, with drainage holes. Use a sterile, fine-textured potting mix or a soilless medium designed for microgreens. A spray bottle is essential for gentle watering, and a clear plastic dome or plastic wrap helps maintain humidity during germination.
Optional items include growing lights, a heat mat, and a small fan for air circulation.
Step 3. Prepare the Growing Trays
Now, prepare your growing trays.
If you’re reusing trays, clean and sanitize them to prevent disease. Fill them with 1-2 inches of pre-moistened growing medium. Level the surface and lightly compress it to create a smooth, even area. Ensure the medium is damp but not waterlogged.
Step 4. Sow the Seeds
When sowing the seeds, calculate the seed density based on the type of microgreen.
Generally, 1-2 tablespoons per 10×20 inch tray works well. Sprinkle the seeds evenly, aiming for about 1/4 inch between them. Gently press the seeds into the soil using a flat object like a small board. For larger seeds like sunflowers or peas, you may need to space them out individually.
Step 5. Cover and Place
Cover the tray with a dome or plastic wrap, ensuring it doesn’t touch the soil surface. Place the covered tray in a warm area, ideally between 65-75°F. Keep it out of direct sunlight during this initial germination phase.
But remember, some seeds, like sunflowers, benefit from weight on top for the first few days.
Step 6. Water and Care
For watering and care, mist the soil surface 1-2 times daily or as needed to keep it consistently moist. Avoid overwatering, which can lead to mold. Once the seeds sprout, remove the cover to prevent excess moisture. Monitor the tray closely during this transition period.

You can take advice from the video to sprout seeds for chickens.
Step 7. Provide Light
After sprouting, provide light. Move the trays to a location with bright, indirect sunlight. If you’re using grow lights, position them 4-6 inches above the tray and ensure they get 12-16 hours of light daily. Rotate the trays if using natural light to promote even growth.
Step 8. Continue Care
Continue caring for your microgreens by watering from the bottom. Place the tray in a shallow container of water for a few minutes, allowing the soil to dry slightly between waterings to prevent mold. A small fan can help improve air circulation if you’re growing indoors.
Always monitor for any signs of disease or pest issues.
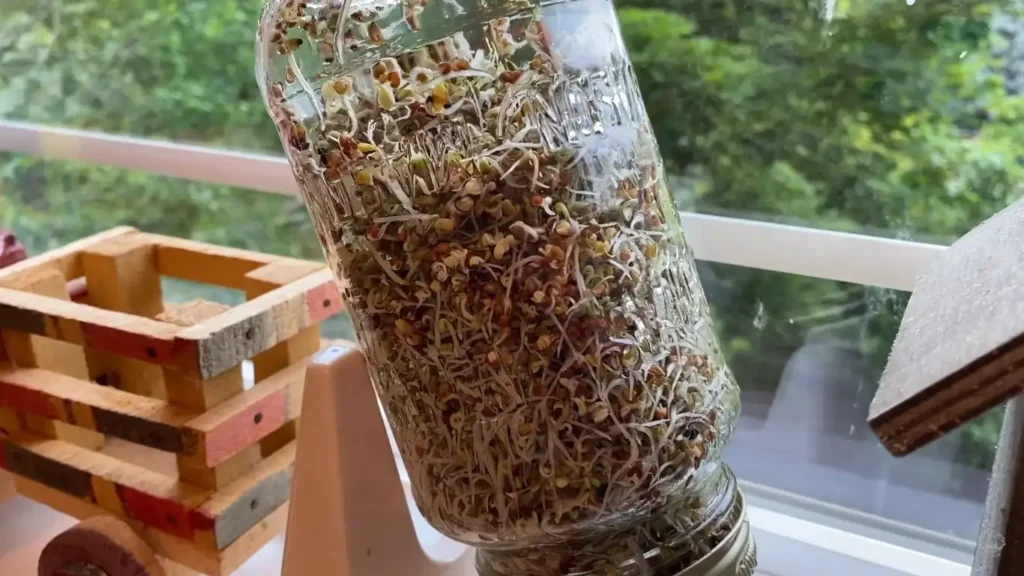
Step 9. Harvesting Time
Finally, harvest your microgreens when the first true leaves appear, usually 7-14 days after planting. Use clean, sharp scissors to cut just above the soil line. Harvest in the morning for the freshest greens. Rinse and dry thoroughly if needed.
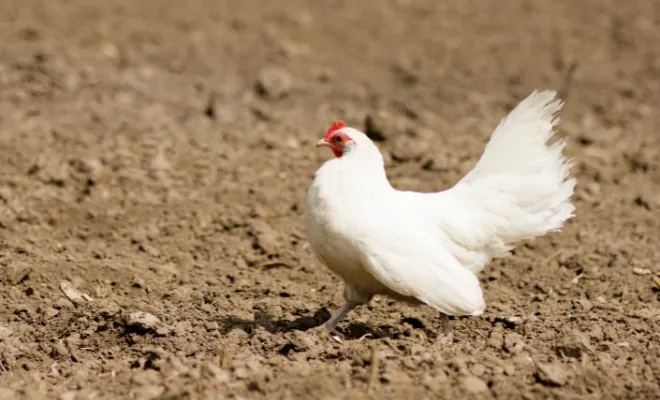
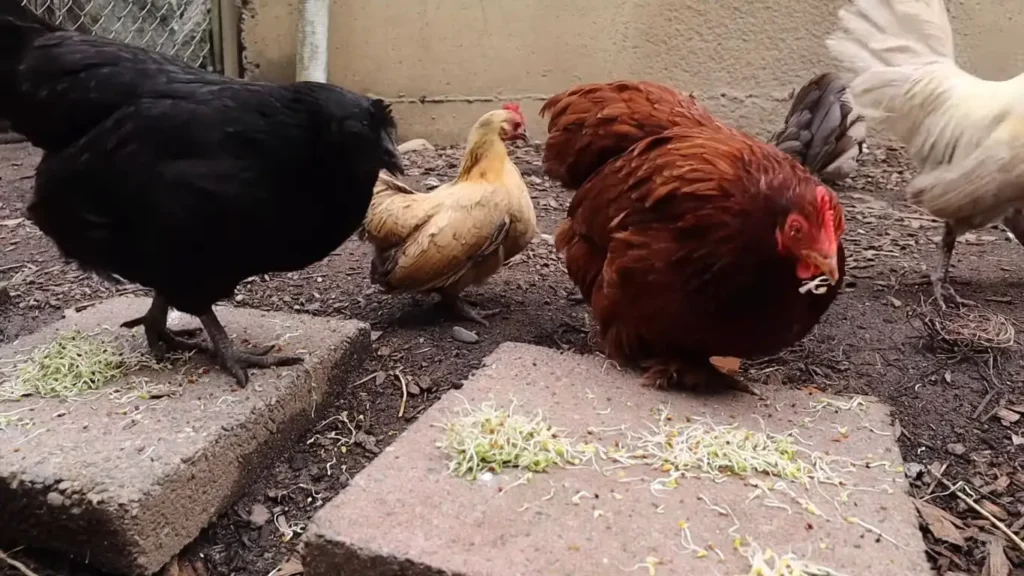
Can Chickens Eat Microgreens?
Yes, Chickens Can Eat Microgreens! In fact, microgreens can be a fantastic addition to your chickens’ diet.
But wait! Are Microgreens good for Chickens? Yes, it’s full of goods with fewer considerations. Here’s a clear explanation –
- Packed with Nutrients: Microgreens are concentrated sources of vitamins, minerals, and antioxidants, often containing many times more than their mature counterparts. This provides a nutritional boost for your chickens.
- Variety and Enrichment: Microgreens offer a fresh, flavorful treat that helps keep your flock engaged and happy.
- Natural Foraging: Chickens love to peck and explore. Microgreens satisfy their natural foraging instincts and provide mental stimulation.
Benefits of Microgreens for Chickens
- Improved overall health and well-being
- Stronger immune system
- Shinier feathers
- Increased egg production (in some cases)
However, keep these things in mind:
- Microgreens should be a supplement, not a replacement for their regular feed.
- Introduce them gradually to avoid digestive upset.
- Offer a variety of microgreens for a well-rounded diet.
- Ensure the microgreens are grown organically and free of pesticides.
List of 10 Best Microgreens for Chickens
Wondering what Microgreens are good for Chickens to eat? Fear not! My research found the 10 best microgreens for your chickens. So, pick your fav from the list!
1. Wheatgrass
Wheatgrass is one of my top choices for chickens. It’s packed with high protein and fiber, which is fantastic for their diet. It’s rich in vitamins A, C, E, and K, supporting their digestive health and boosting egg production.
Adding wheatgrass to your chickens’ meals can keep them healthy and productive.
2. Sunflower Shoots
Sunflower shoots are a favorite for my flock. They’re excellent for providing protein and healthy fats, and they contain vitamins B, D, and E. These vitamins promote feather health and overall vitality, making sunflower shoots a nutritious addition to enhance your chickens’ well-being.
3. Pea Shoots
Pea shoots are another great choice.
They’re high in protein and antioxidants, and they’re a good source of vitamins A and C. These nutrients support the immune system and bone health. Feeding pea shoots to your chickens can help boost their immunity and strengthen their bones.
4. Radish Microgreens
Radish microgreens have a spicy flavor that my chickens absolutely love. They are rich in vitamins C and B6, which aid digestion and support liver function. Including radish microgreens in your chickens’ diet can help improve their digestive health.
5. Broccoli Microgreens
Broccoli microgreens are loaded with sulforaphane, a potent antioxidant. They also provide vitamins A, C, and K, which support immune health and may have anti-inflammatory properties.
These microgreens can help enhance your chickens’ immune system and keep them healthy.
6. Kale Microgreens
Kale microgreens are a powerhouse of nutrition. They’re packed with vitamins A, C, and K, and are high in calcium and iron. These nutrients support bone health and strengthen eggshells.
Feeding kale microgreens to your chickens can help ensure they have strong bones and sturdy eggs.
7. Mustard Microgreens
Mustard microgreens have a spicy flavor that stimulates my chickens’ appetite. They’re rich in vitamins A, C, and K, which may help with respiratory health.
Adding mustard microgreens to your chickens’ diet can encourage them to eat more and support their respiratory system.
8. Beet Microgreens
Beet microgreens are high in antioxidants and folate. Such greens contain betalains, which support detoxification and may improve circulation and overall health. These microgreens can help cleanse your chickens’ system and boost their overall health.
9. Amaranth Microgreens
Amaranth microgreens are rich in protein and essential amino acids.
They’re a good source of calcium and iron, supporting overall growth and development. Including amaranth microgreens in your chickens’ diet can aid in their growth and development, ensuring they stay strong and healthy.
10. Basil Microgreens
Basil microgreens contain essential oils with antibacterial properties.
They’re rich in vitamins A and K, which may help reduce stress in chickens. Feeding basil microgreens to your chickens can help keep them calm and healthy, making them a great addition to their diet.
I believe these are the fast growing greens for chickens as well.
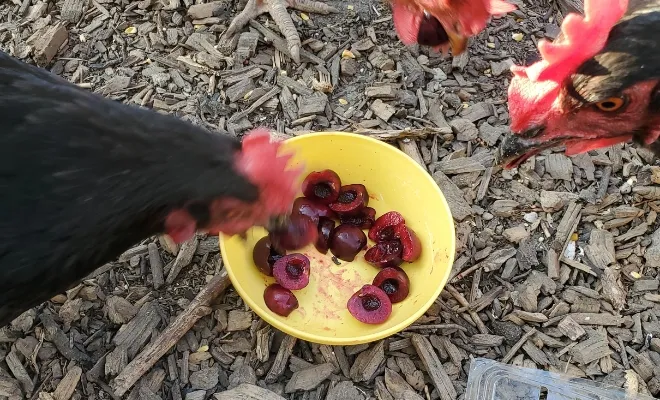
How to Feed Microgreens to Chickens? 6 Tips!
With consistent offerings, chickens will likely develop a taste for microgreens. But how to feed microgreens? Here’s a guide –
- Start Slow: Introduce microgreens gradually to avoid digestive upset. Begin with a small handful mixed in with their regular feed and observe their response. You can gradually increase the amount over a few days.
- Variety is Key: Offer a mix of different microgreens for a well-rounded nutritional boost and to keep your flock interested.
- Freshness Matters: Only feed your chickens fresh micro greens. Wilted or moldy greens can be harmful.
- Chopping Up: Consider chopping larger microgreens, especially varieties with tough stems, to make them easier for chicks and smaller chickens to consume.
- Separate Feeding: While microgreens can be mixed with regular feed, some chicken enthusiasts prefer offering them as a separate treat. Scatter them on the ground in their coop or run for a fun foraging experience.
- Organic is Best: Ensure the microgreens you feed your chickens are organically grown and free of pesticides or herbicides.
Related Reads:
How much to feed microgreens to chickens?
Start with a small handful of microgreens mixed with their regular feed and gradually increase over a few days. There’s no set amount – monitor their intake and adjust based on their flock size and interest.
However, see the video to learn how you feed such greens to your flocks.
FAQs
Have more questions about growing microgreens for chickens? Learn from the Q&A section!
Q. How fast do microgreens grow for chickens?
Most microgreens are ready in 5-10 days, perfect for a quick and nutritious treat.
Q. Do microgreens regrow after cutting for chickens?
No, most microgreens won’t regrow after harvesting. Plant new batches for a continuous supply.
Q. What microgreens can chickens NOT eat?
Avoid nightshade plants (tomatoes, peppers, eggplant, potatoes) and beansprouts as they are toxic to chickens.
Final Word
Growing microgreens for your chickens is a simple and rewarding process. With basic supplies and a little care, you can provide your flock with nutrient-packed treats in just a few weeks. These tiny greens offer a variety of health benefits, from improved egg production to stronger immune systems.
Remember to introduce microgreens gradually and offer a variety of types. By following the steps outlined and choosing from the recommended varieties, you can enhance your chickens’ diet and overall well-being