Building a Chicken Tunnel (Chunnel): A 7 Step-by-Step Guide

Chicken chunnels, also known as chicken tunnels, are narrow pathways designed for chickens. These tunnels provide a safe and controlled environment for chickens to roam and forage. They are usually made of wire mesh or other sturdy materials.
To make a chicken tunnel, you’ll need some materials, first. Then, use PVC pipes or stakes to create a frame for support. Cut the wire mesh to size and attach it to the frame with zip ties. Make sure it’s securely connected to the coop and endpoint. Check for sharp edges and cover them. This setup keeps your chickens safe and lets them explore safely.
Want to see the step-by-step process to make chicken chunnels in detail? Spend two more minutes here!
Table of Contents
What Are The Benefits of A Chicken Tunnel?
Thinking about raising chickens in your urban backyard but worried about space and safety? Chicken tunnels, or chunnels, are the answer!
Here’s why you should build a chunnel for your flock:
- Safe Haven: Chunnels keep your chickens safe from predators like foxes, raccoons, and hawks. The secure mesh enclosure is like a fortress for your flock.
- Fresh Air & Sunshine: Unlike stuffy coops, chunnels let your chickens enjoy the outdoors. Fresh air and natural light are essential for their health and happiness.
- Room to Roam: Inside the chunnel, your chickens can scratch, dust bathe, and search for bugs and greens. This freedom to explore keeps them active and healthy.
- Easy Cleaning: The wire mesh design makes cleaning the chunnel a breeze. No more struggling in cramped spaces!
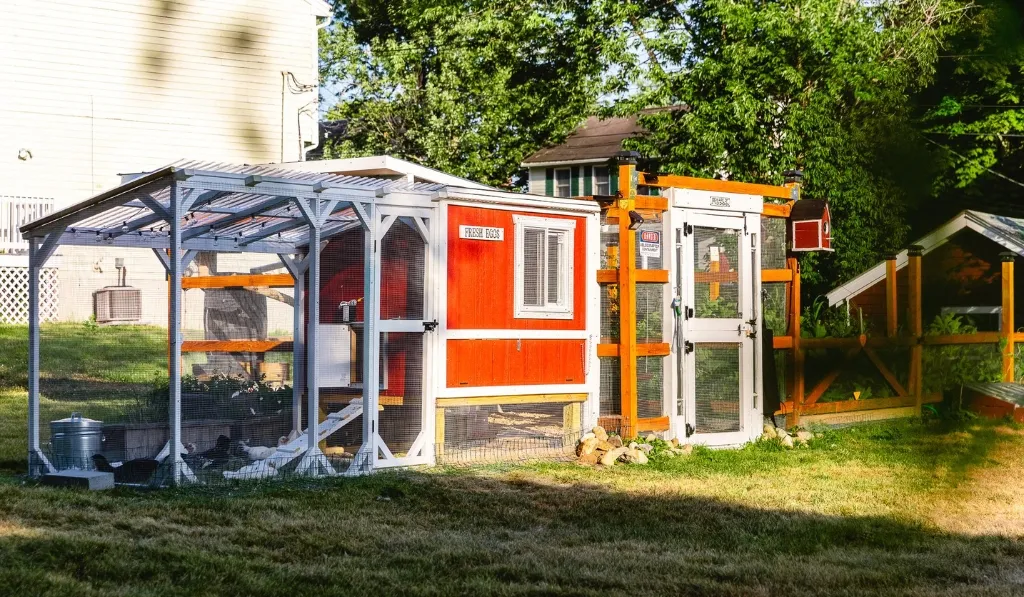
- Urban Oasis: Chunnels can be designed to look great in your backyard. Choose a design that complements your urban landscape and adds a touch of charm.
- Regulation Friendly: Chunnels can help you comply with local chicken-keeping rules. The secure design addresses concerns about noise, odor, and wandering birds.
- Reduced Feed Costs: With access to fresh greens and insects found while foraging in the chunnel, your chickens may require slightly less store-bought feed, saving you some money.
- Stronger Eggshells: Exposure to sunlight in the chunnel can contribute to the production of eggs with stronger shells, thanks to increased vitamin D levels in your hens.
- Stress Reduction: The ability to roam and explore in a secure environment helps to reduce stress levels in chickens, leading to happier and potentially more productive hens.
- Natural Pest Control: Your chickens will love munching on pesky bugs they find in the chunnel, acting as natural pest control for your yard.
How to Make A Chicken Tunnel?
Limited space got you clucking about keeping chickens? Fear not! This guide will show you how to create a DIY chicken tunnel for your feathered friends.
Design and Construction: What Materials Are Used for Chicken Tunnels?
When it comes to designing and constructing a chicken chunnel, several materials are commonly used:
- Wire Mesh: This is a popular choice as it provides the necessary security and ventilation for the enclosure. Choose a sturdy, galvanized mesh with an appropriate hole size to prevent escapes and deter smaller predators.
- Wood: Treated lumber is a popular choice for the frame, offering good support and ease of construction. Cedar is naturally rot-resistant, but other pressure-treated options are also suitable.
- PVC Pipes: These lightweight pipes provide a good alternative to wood, especially for curved sections. Choose a diameter strong enough to handle the weight of the wire mesh.
- Metal Poles: For a more permanent structure, metal poles or pipes can be used, although they may be more expensive.
Remember: Always prioritize using predator-proof materials and secure construction techniques to keep your chickens safe.
Building Your Chicken Chunnel: A Step-by-Step Guide
Ready to get your hands dirty and build a chunnel for your flock? Here’s a basic guide to getting you started:
#Step 1. Plan Your Design: Decide on the length, width, and any curves or bends you want in your tunnel. Sketch a simple plan to visualize the layout and calculate material needs.
#Step 2. Gather Materials: Get your chicken wire mesh, framing materials (wood or PVC pipes), hardware cloth (optional), zip ties/staples, and door hinges.
#Step 3. Build the Frame: Cut your lumber or PVC pipes according to your design plan. Assemble the frame, ensuring strong and secure connections, especially at corners.
#Step 4. Attach the Hardware Cloth (optional): If using hardware cloth, secure it to the bottom section of the frame for added predator protection.
#Step 5. Attach the Chicken Wire Mesh: Drape the mesh over the entire frame, ensuring it covers the top and sides completely. Use zip ties or staples to securely fasten the mesh to the frame.
#Step 6. Create the Door: Build a small door frame at the coop end and attach it with hinges for easy access.
#Step 7. Secure the Ends: Fold the excess wire mesh at the ends of the tunnel and secure it for a finished look.
Check out this video to get more ideas about chicken chunnels or tunnels.
5 Things to Consider for Creating Chicken Channels
Wait, my friend! You’re done building chicken chunnel but some considerations must be mentioned!
- Access and Ventilation: Make it easy for your feathered friends to come and go by installing access doors strategically. These doors not only give your chickens the freedom to move but also make cleaning and maintenance a breeze for you.
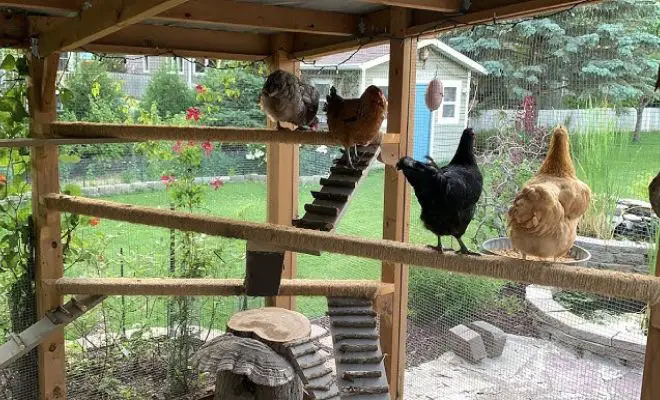
- Interior Features: Transform the inside of your chunnel into a cozy haven by adding nesting boxes, perches, and dust bath areas. These enhancements encourage natural behaviors and ensure your chickens feel right at home.
- Ventilation: Keep the air fresh and comfortable inside the chunnel by incorporating proper ventilation. Thoughtfully placed openings allow for the circulation of fresh air while preventing any moisture buildup.
- Location: Choose the perfect spot for your chunnel—one that basks in partial sunlight, boasts good drainage, and sits conveniently close to your chicken run or coop. This ideal location ensures your chickens have a comfortable and accessible space to roam.
- Landscaping: Put the final touches on your chunnel by blending it seamlessly into your backyard oasis. Consider landscaping around the chunnel to enhance its aesthetic appeal and create a harmonious environment for both you and your chickens.
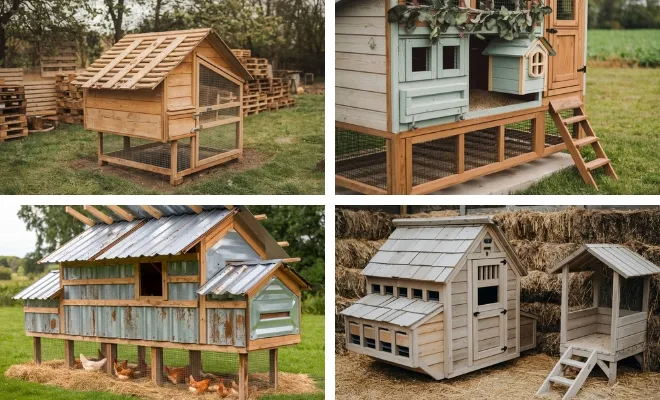
7 Different Types of Chicken Tunnel or Chunnel Ideas
There are several different types of chicken tunnels or chunnels that urban chicken keepers can choose from, each with its own unique design and features. Here are some common types:
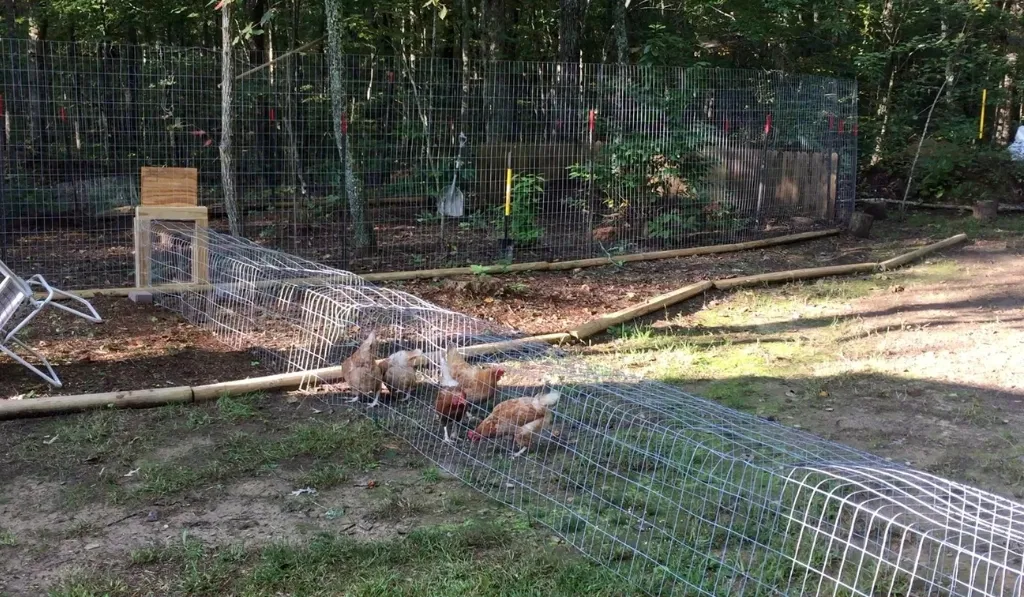
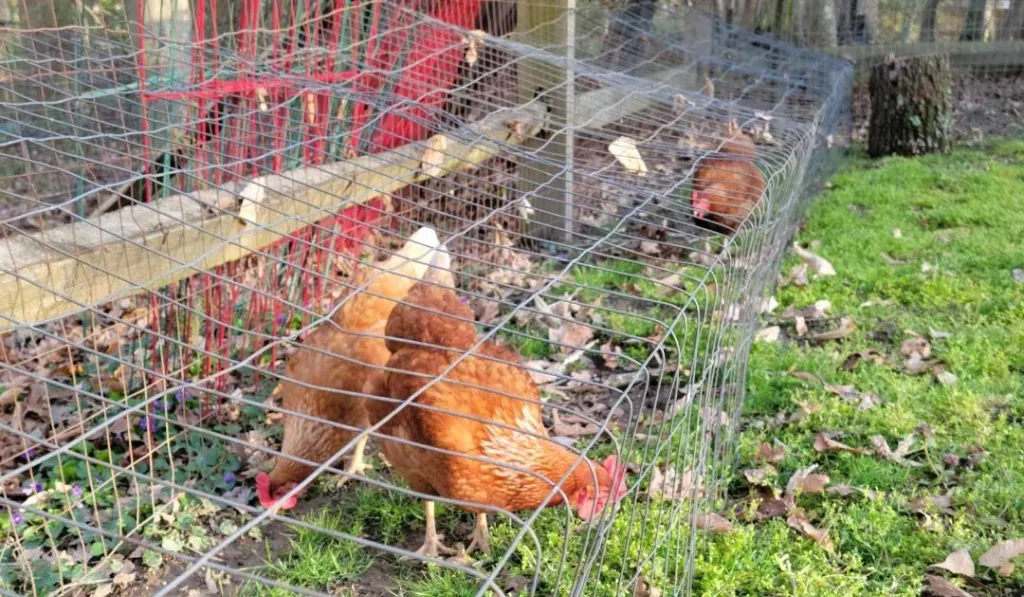
- Straight Tunnel: This is the most basic and straightforward design, consisting of a long, enclosed run with a wire mesh or netting covering. It allows chickens to move freely in a single direction.
- L-shaped or U-shaped Tunnel: These tunnels have a bend or curve in their design, creating an L or U shape. This allows for more efficient use of space and can provide additional areas for chickens to explore.
- Modular Tunnel System: This type consists of multiple sections or modules that can be easily connected or disconnected, allowing for flexibility in size and configuration. It’s a great option for those with limited space or who need to move the tunnel frequently.
- Raised Tunnel: Elevated off the ground, raised tunnels can be beneficial in areas with poor drainage or where predators are a significant concern. They provide an additional layer of security and can be designed with a solid bottom for easy cleaning.
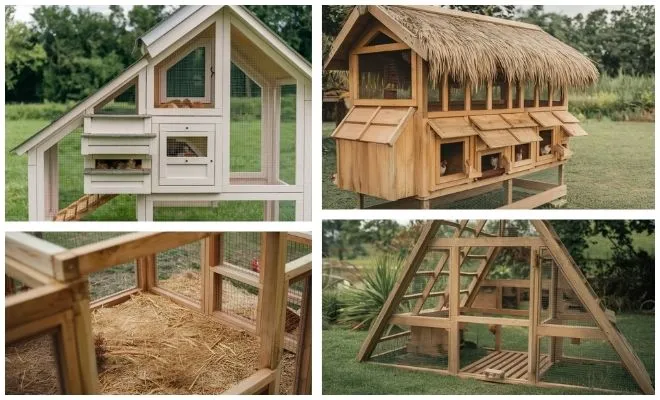
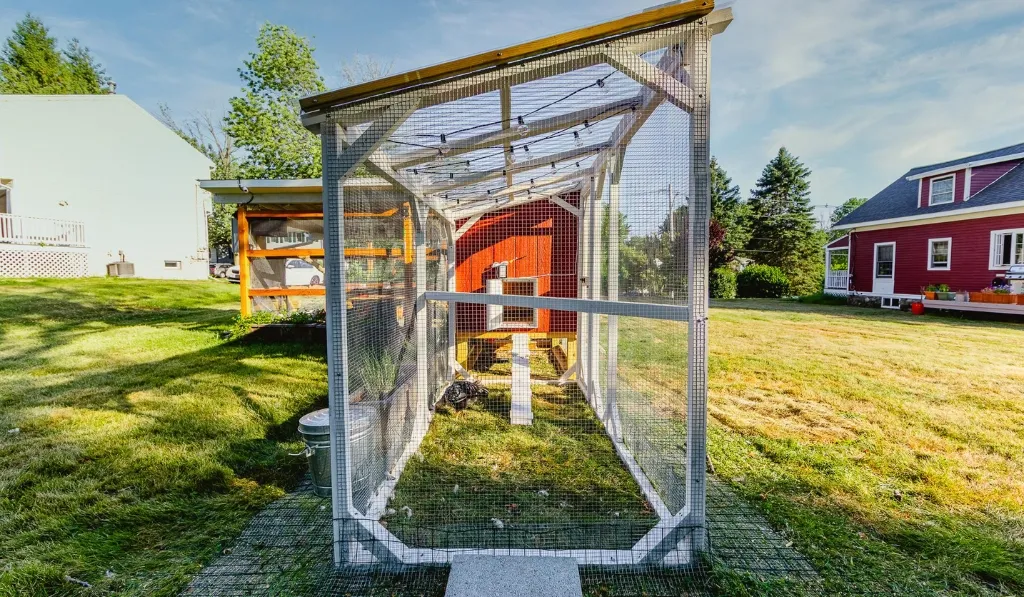
- Greenhouse-Style Tunnel: Incorporating elements of a greenhouse, these tunnels often have a clear or translucent roof, providing ample natural light and warmth for the chickens. They can also be used for growing plants or vegetables alongside the chicken run.
- A-Frame Tunnel: Shaped like an A-frame, these tunnels offer a unique and visually appealing design. They typically have a solid roof and can be constructed with various materials, such as wood or metal.
- Portable Tunnel: Designed to be easily moved, portable tunnels are often made of lightweight materials like PVC pipes and mesh netting. They can be relocated to different areas of the yard, allowing for rotation and preventing soil depletion.
Related Reads:
FAQs
Got more chicken tunnel questions? We’ve got answers! Check out our FAQs to ensure a smooth building experience.
Q. Are chunnels suitable for all climates?
Chunnels can be adapted to various climates by incorporating appropriate ventilation, insulation, and shade provisions.
Q. How many chickens can be housed in a chunnel?
The number of chickens depends on the size of the chunnel and local regulations. Generally, a chunnel should provide at least 4-5 square feet per chicken for optimal space.
Q. Can chunnels be moved or relocated?
Yes, chunnels can be designed to be movable or modular, allowing for relocation or rearrangement as needed.
Q. How do I prevent chickens from escaping the chunnel?
Proper construction with secure mesh and access points is crucial. Additionally, providing enrichment and foraging opportunities within the chunnel can reduce the desire to escape.
Q. How often should I clean and maintain the chunnel?
Regular cleaning and maintenance are essential for the health and well-being of your flock. Aim to clean the chunnel at least once a week and perform deeper cleanings as needed.
Summary
Ready to start the DIY chicken tunnel project? Don’t miss out the guides I shared! These clever structures offer safety, space, and compliance, all while sprucing up your backyard. From keeping predators at bay to saving on feed costs, the perks are clear.
Enjoy urban farming and build a chunnel for your feathered friends! It’s about more than just raising chickens, it’s about creating a happier, greener life for all.