DIY Chick Brooder Inside Chicken Coop: Save Dollars & Keep Chicks Cozy!

A chick brooder is like a warm, snug nursery for your adorable baby chicks. Whether you’re a seasoned farmer or a backyard chicken enthusiast, setting up a brooder is essential.
But how to make a chick brooder? The key to a successful brooder is managing temperature, space, and cleanliness. Chicks need a warm area to thrive. Besides, they need enough room to move around and access to clean food and water. So, choose your container, get other stuff, and make a DIY brooder!
Remember, a brooder is where your baby chicks will thrive until they’re ready to venture out on their own. So, let’s learn the guide to raise them in different brooders!
Table of Contents
How to Make A Chick Brooder? Easy DIY Chick Brooder!
Chicks are born without the ability to regulate their own body temperature. So, a brooder is essential for their survival.
But if I consider you as a newbie poultry owner, you should clearly know what brooding a chick means.
A chick brooder is a temporary home for baby chicks. It carries a lot of benefits for the little chicks. So, here are the purposes –
- Purpose: Chicks are born without feathers and can’t keep themselves warm. A brooder mimics the warmth and protection they would receive from a mother hen.
- Lifespan: Chicks typically outgrow their brooder at around 6-8 weeks old, when they can fully feather and maintain their body temperature.
- Design: Brooders can be simple or elaborate in design. But they all need to provide essential elements like heat, ventilation, light, and space for homemade brooder.
You can buy a brooder pre-made or construct your own from a variety of materials. Like cardboard boxes, plastic bins, or wood!
Now, what are the factors for successful brooding? Be sure you offer –
- Ventilation
- Humidity
- Lighting
- Space
- Cleanliness
- Food and Water
- Safety and some other needs.
When do baby chicks require a brooder box? Baby chicks need a brooder box from the moment they hatch until they are fully feathered. Which typically takes around 6 to 8 weeks, as I said before.
Making A Chick Brooder: Steps to Follow
Before we know the steps to create a chick brooder, consider a few facts.
Materials You Need for Making A Chick Brooder
There are two main approaches to building a chick brooder: repurposing a container or building one with wood. Here are the things you need to make the chicken brooder –
- Container
- Heat lamp and guard
- Thermometer
- Chick feeder and chick waterer
- Bedding
- Large plastic bin or stock tank
- Wood for the frame
- Hardware cloth
- Screws and nails
- Hinges and door latch (Optional)
Guide to Build Baby Chicks Brooder
With a little planning, you can create an environment for your chicks to thrive. So, follow the guidelines I am including!
Planning Your Brooder: What to Follow?
Before building your chick brooder, it’s crucial to plan the size and capacity for your feathered friends. Here’s what you need to follow.
Space for Comfort
Each chick needs enough space to move around, eat, and sleep comfortably.
The general rule of thumb is 2 square feet (0.18 square meters) of floor space per chick. This ensures they have room to roam without feeling cramped. Plus, it reduces stress and promotes healthy growth.
Counting Chicks Before Hatching
Knowing how many chicks you’ll be raising is vital. Are you expecting a small backyard flock or a larger operation?
Once you have a chick count, you can calculate the total brooder space needed. It is by using the 2 square feet per chick.
Calculating Brooder Square Footage
Here’s the simple formula to determine the ideal brooder size:
Number of Chicks x 2 square feet per chick = Total Brooder Square Footage
For example, if you’re expecting 10 chicks, you’ll need a brooder with at least 20 square feet (10 chicks x 2 sq ft/chick = 20 sq ft) of floor space.
Remember, more space is always better, especially if you plan to keep the chicks in the brooder longer. Consider adding an extra 20-30% of space to your calculations.
To be more specific,
A suitable brooder frame can be 75 cm x 60 cm x 10 cm (length x width x depth). This frame can accommodate up to 50 two-day-old chicks.
For chicks aged a few days to two weeks, allocate 465 cm² per chick. For four-week-old chicks, provide 930 cm² per chick.
Alternatively, a circular brooder with a 6-foot diameter can also house 50 chicks.
Location: What place is best to build a brooder?
Start a chick brooder DIY project by selecting a safe space! Here are some factors to consider:
Safe and Secure
Keep your chicks safe from predators like rodents, cats, or other animals. Ensure the brooder is in a secure building or enclosure that predators can’t access.
Chicks can be surprisingly crafty escape artists! Make sure the brooder itself is escape-proof with secure walls and a top.
Temperature Matters
Chicks are sensitive to drafts, which can cause them to chill. Place the brooder in a location away from doors, windows, or vents.
Avoid areas with extreme temperature fluctuations. A stable environment is ideal for regulating chick temperature, especially since they can’t control it themselves. Rooms with moderate temperatures are preferable.
Ensure Peace and Calmness
Chicks can get stressed by loud noises or excessive activity. Choose a location that’s relatively quiet and calm, away from high-traffic areas or noisy appliances.
Sunlight Exposure
While chicks don’t need direct sunlight all day, a little sun exposure can be beneficial. If possible, place the brooder near a window with indirect sunlight for a few hours a day.
Easy Access
You’ll need to check on your chicks regularly to monitor their health and adjust the heat lamp as needed. Choose a location that’s easy for you to access without disturbing them too much.
Choosing a Brooder Container: Which one is more beneficial?
Repurposed Container vs. Wooden Frame Brooder: Which One to Pick for the Chicks?
So you’ve figured out the size and location for your chick brooder. But which container should you use?
Here’s a breakdown of the two most common options to help you choose from!
Repurposed Container Brooder
Repurposing a bin or stock tank is a cost-effective option. You might already have a suitable container lying around. Minimal modifications are needed for ventilation and heat lamp attachment. And they will be easy to move around if necessary.
On the flip side, Repurposed containers might not be suitable for raising a large number of chicks. Plastic bins can be prone to cracking or breaking.
Unfortunately, it may offer less flexibility in terms of adding features like a door.
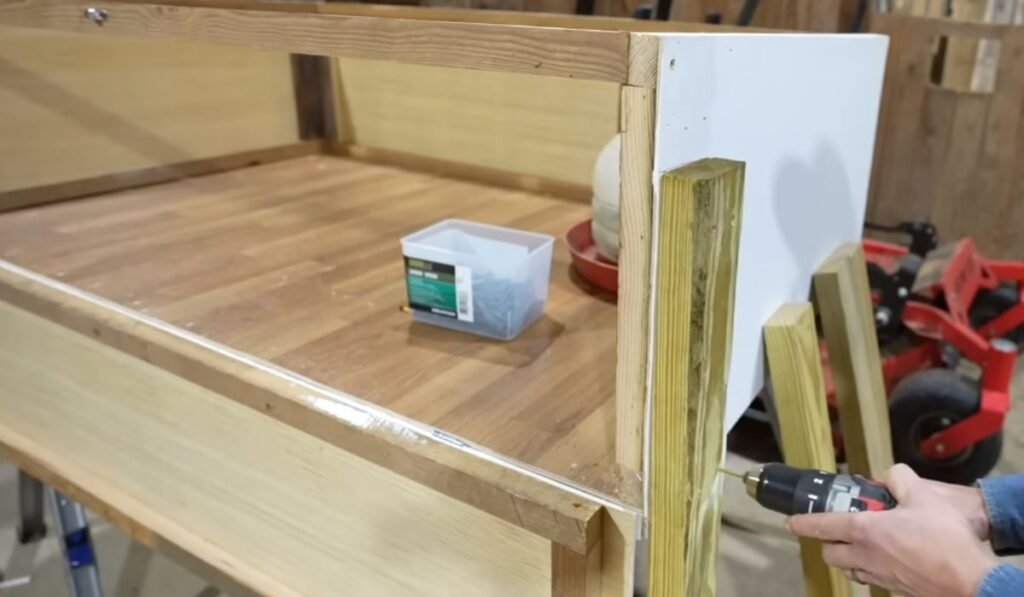
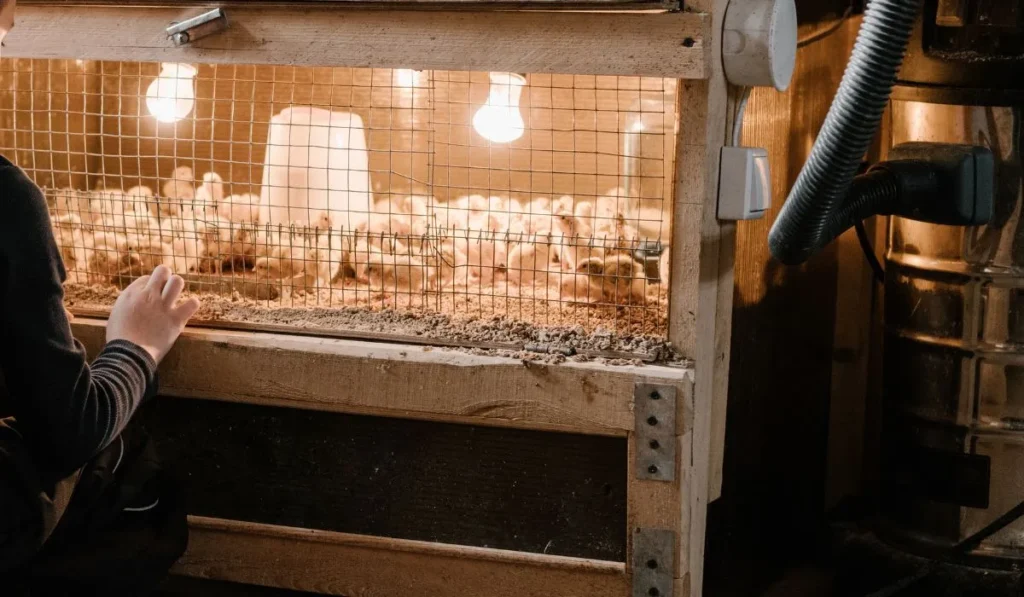
Wooden Frame Brooder
A well-built wooden brooder can last for many brooding seasons! You can build the brooder to the exact size you need based on your chick count.
It easily adds features like a hinged door for easier access and cleaning. You have more control over ventilation placement with a wooden frame.
Sadly, building a wooden frame requires some basic carpentry skills. It takes more time and effort to construct compared to a repurposed container.
Also, wooden brooders are heavier and less portable than plastic bins.
However, I would say pick one from the following ideas –
- Large Plastic Storage Tote: Convenient and easy to clean.
- Metal Tub or Stock Tank: Sturdy and durable.
- Thick Cardboard Box: Simple and inexpensive.
- Homemade Plywood Box: Customizable.
- Portable Cribs (like a Pack N Play): Creative and adaptable.
Setting Up the Heating Element: How to Set?
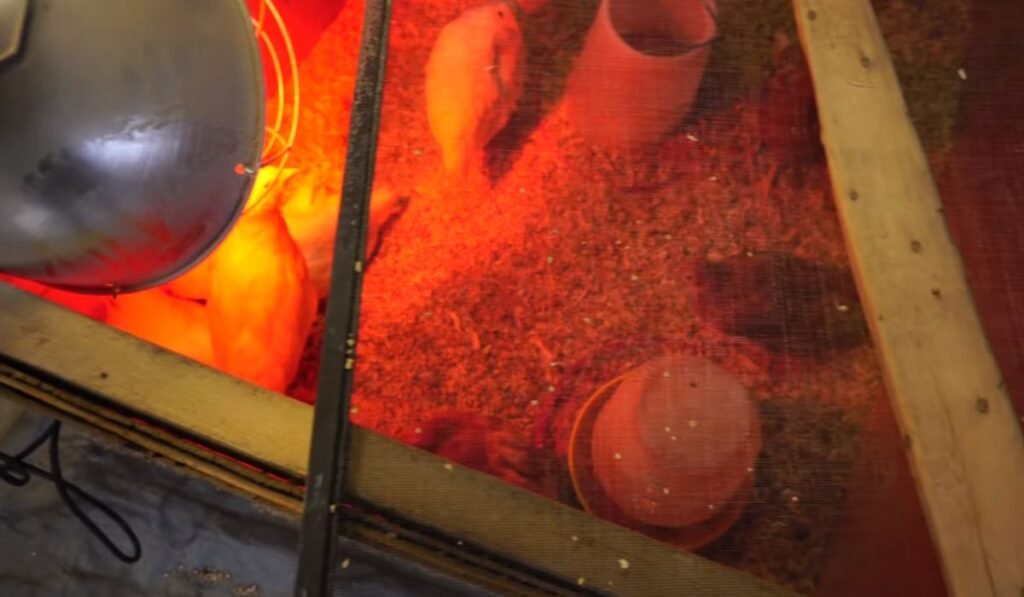
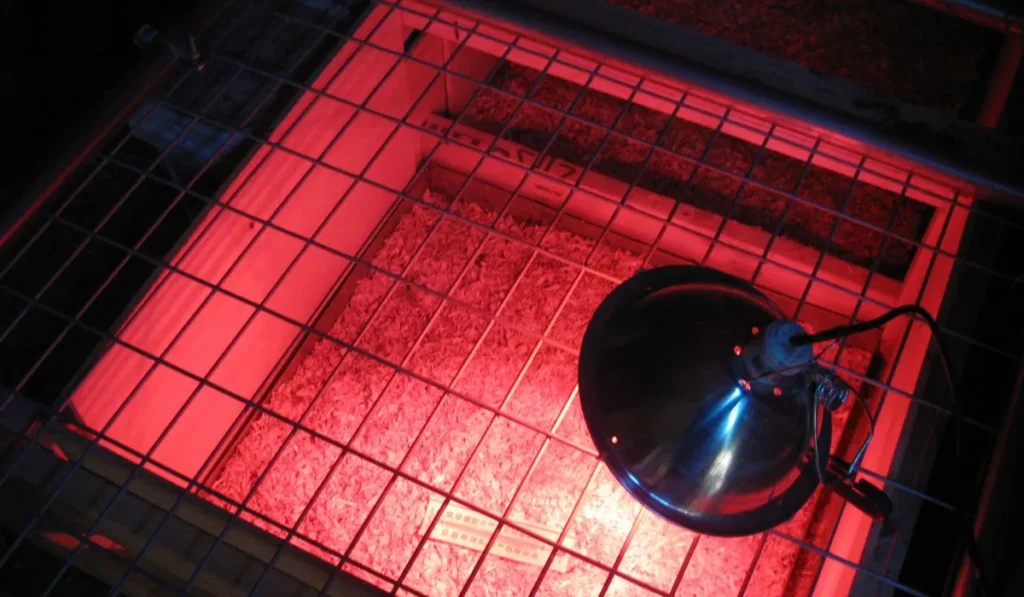
To keep your chicks warm and cozy, you’ll need to set up a heat lamp correctly. Here’s a simple guide:
Choosing the Right Bulb
Use a 250-watt red bulb to keep the chicks warm without encouraging them to peck each other. Lower the heat as the chicks get older. It’s by either using a bulb with less wattage or raising the lamp higher.
Positioning the Heat Lamp
Make sure the lamp is hung securely and not too close to the bedding. It may avoid any fire risk. Avoid hanging the lamp by the cord. Also, keep the bulb from splashing water.
A good starting point is 12-18 inches above the ground.
Set up the lamp so there’s a warmer area under it and cooler areas further away. This way, chicks can move to where they feel comfortable.
Monitoring Temperature
Place it on the floor of the brooder, but not right under the lamp. It’s to get a good sense of the temperature where the chicks are.
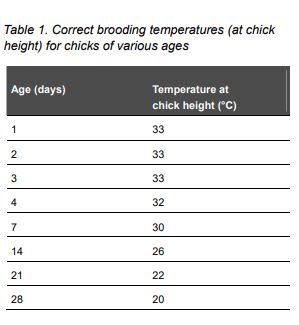
Keep an eye on the temperature with regular checks. Adjusting the lamp’s height or changing the bulb as needed to keep the chicks at the right warmth.
Bedding and Flooring: What type of bed and floor for a chick brooder?
Chicks have specific needs when it comes to their brooder floor and bedding. Let’s see what’s good for them!
The Brooder Floor
The floor should be flat, solid, and easy to wipe clean. This stops moisture build-up and keeps nasty germs away from your chicks.
- Line the brooder with a plastic sheet for easy cleaning and to block drafts.
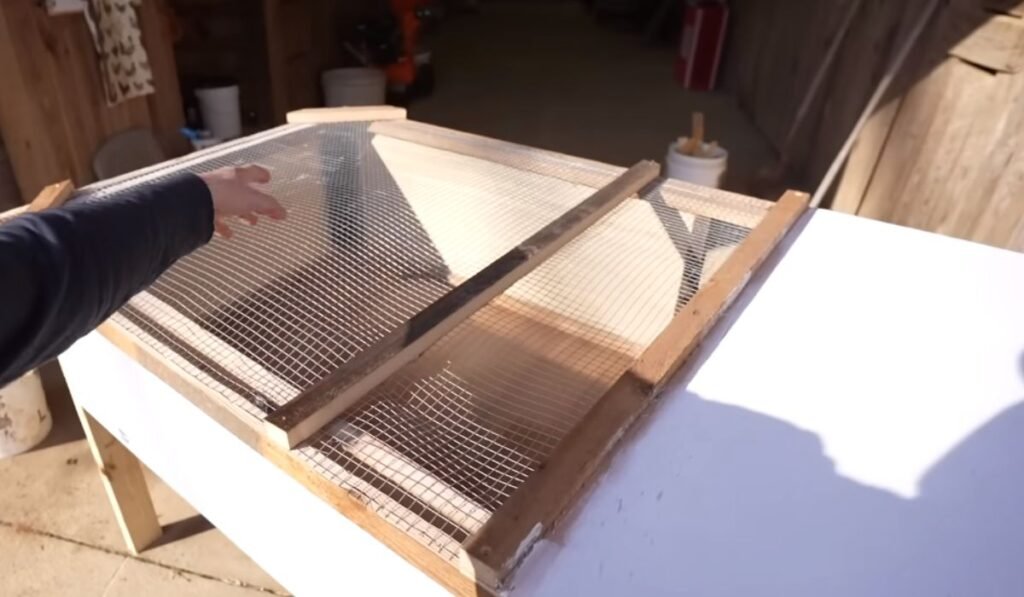
- You can also use raised wire mesh flooring.
- This lets droppings fall through, keeping the bedding drier and fresher.
Note: Make sure chicks have a small solid area with bedding to rest their feet on. Standing on wire mesh all day can be uncomfortable for their growing legs!
Ideal Bedding
Pine shavings are popular and easy to find. Just choose kiln-dried ones to cut down on dust.
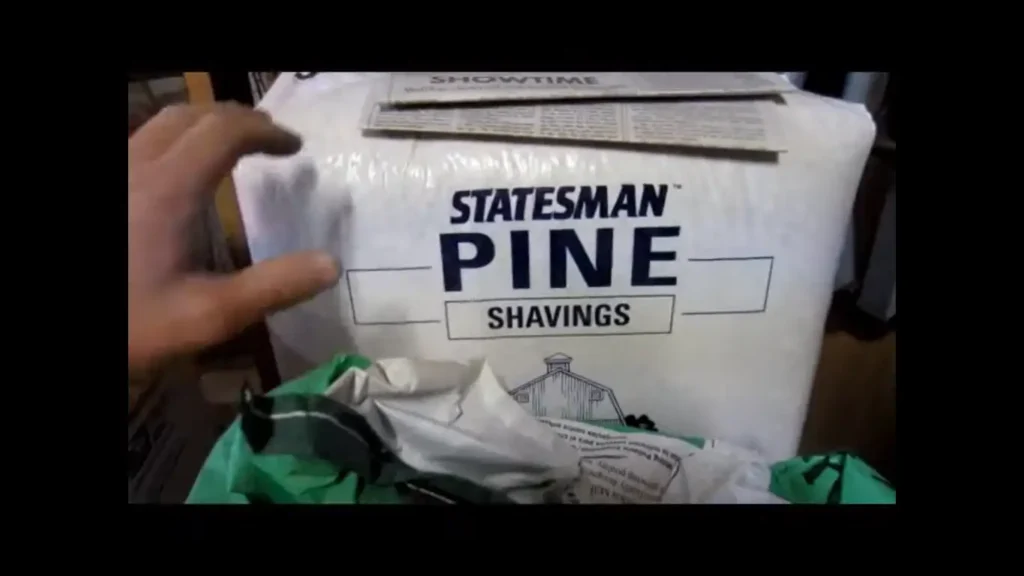
Chopped paper towels are a budget-friendly and absorbent option. It’s especially for the first few days when chicks are tiny.
Eco-friendly and super absorbent. But it costs more than other options.
Alfalfa Adventure can also be absorbent. But it can be dusty and might make chicks eat the bedding instead of their food. Use it carefully!
Things to Avoid:
- No cedar or treated wood shavings
- Straw or hay
- Avoid using sand
Special Tips: For the first few days, use a thin layer of bedding (about 1 inch). Change the bedding regularly, at least once a week. Keep an eye on your chicks and adjust the bedding depth or type if needed.
Feeding and Watering: How to feed?
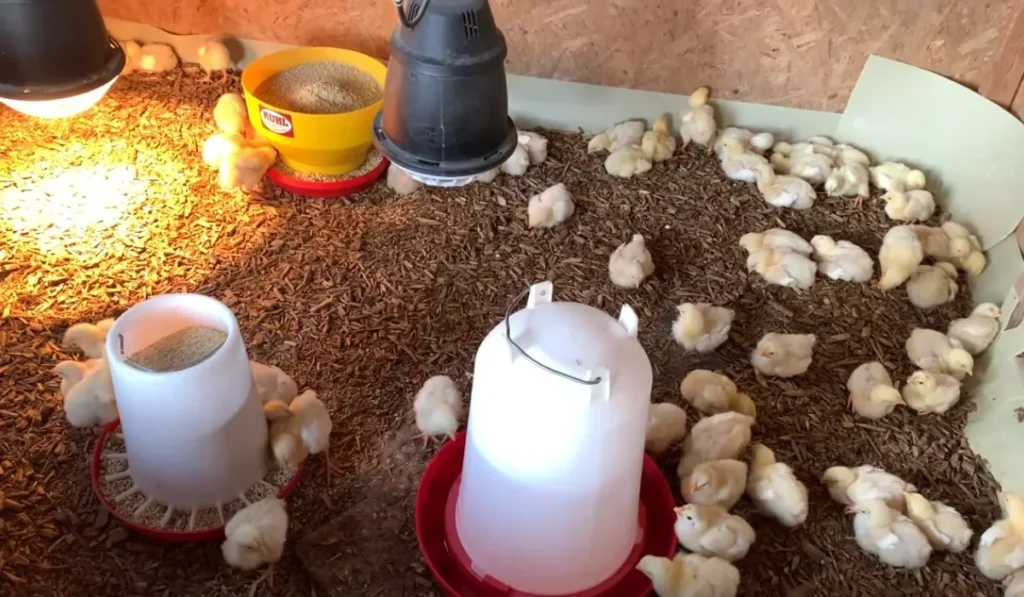
Keeping your chicks healthy means ensuring they have access to the right food and water at all times.
Food for Growing Chicks
Chick Starter Feed is specially formulated to provide all the nutrients chicks need. It’s for quick healthy growth and development.
Look for “chick starter” or “broiler starter” crumble at your local farm store. Avoid medicated feed unless specifically recommended by a vet.
Always offer fresh chick starters and keep the feeders clean to prevent mold and bacteria growth.
Use chick-specific feeders that are low to the ground and easy for chicks to access. Avoid feeders with large openings that allow chicks to waste food.
Water Need
Just like you, chicks need clean, fresh water to stay healthy. Choose chick-specific waterers with a base that prevents tipping and spilling.
Bells or marbles placed in the waterer can help chicks find it.
But you need to change the water daily. Monitor the water level and refill as needed to avoid chicks going thirsty.
Here’s a Handy Feeding and Watering Schedule
- From Day 1: Offer fresh chick starter and clean water when chicks arrive in the brooder.
- First Week: Chicks eat and drink frequently. Monitor feeders and waterers closely and refill as needed.
- Beyond Week 1: As chicks grow, they’ll need slightly less food per chick. But the total amount of food will increase as there are more beaks to feed!
Ensuring Proper Ventilation: How to ensure enough airspace?
Chicks need fresh air, just like us! This keeps them healthy and prevents stinky ammonia build-up. Here’s how to give your chicks enough breathing room:
- Make holes in the brooder walls or lid, spaced out evenly near the top and sides.
- The holes should be about 1 square inch per chick.
- Cover the holes with wire mesh to keep chicks safe and fresh air flowing.
- Make sure the holes don’t create cold drafts.
Signs of poor ventilation
- Strong ammonia smell
- Chicks panting a lot
If you see these signs, make more ventilation holes or change the bedding more often.
The following video can help you make a perfect chick brooder.
Safety Measures: How to keep chicks in predator-friendly brooders?
Prefer to keep the chicks safe? Follow the given tips –
- Strong Walls: Build a brooder with sturdy materials. Also, seal any gaps so chicks can’t escape and predators can’t get in.
- Locked Lid: Secure the lid with latches or locks to keep out sneaky visitors.
- Mesh Magic: Cover ventilation holes with strong wire mesh.
- Off the Ground: Elevate the brooder on a table or shelf.
- Safe Place: Put the brooder in a secure building like a garage or shed. It should be away from noise and traffic.
- Be Alert: Regularly check the brooder for damage. Also, keep an eye on your chicks for signs of trouble.
Transitioning Chicks to a Coop: When they are ready to go outside?
The time to let the chicks go outside actually depends! However, you need to wait until chicks are 6 to 7 weeks old. Or look for the fully feathered friends!
I would say to gradually decrease the brooder temperature from 90-95°F each week.
It’s better to adjust feeders and perches to chick height. You can also add an access ramp if the coop is elevated.
For slow transition –
- Start with 1 hour outside in a secure run.
- Gradually increase outdoor time to 5-6 hours.
- Let chicks explore the coop at their own pace.
Suggestions: Avoid placing chicks with adult chickens initially. Create a separate run for chicks alongside adults.
Should You Make A Homemade Chicken Brooder or Alternatives?
Choosing between a homemade chicken brooder or alternatives depends on a few factors:
Homemade Brooders
You can use recycled materials or repurpose items that you already have. It ensures a budget-friendly option!
You can design the brooder to fit your specific needs and space limitations.
Building a brooder takes time and effort, requiring carpentry skills and gathering materials.
You need to ensure proper ventilation, heat source safety, and predator-proofing. It can be challenging with a homemade brooder.
Alternative Brooders
Readily available pre-made brooders are easy to set up and use. So, it saves you time and effort.
Commercial brooders often have built-in safety features like heat guards and secure lids. It reduces the risk of accidents.
Pre-made brooders can be more expensive than building your own. Also, you might have fewer size or customization options.
Related Articles:
- Ideal Timetable for Putting Chickens Outside
- Types of Poultry Coop Spray
- Do Baby Chicks Need a Heat Lamp
- Make a Dropping Board for Chicken Coop
FAQs
You can also check out the following queries about chick brooder.
Q: Can I build a cheap chick brooder?
Yes! Homemade brooders can be cost-effective if you use recycled materials. For example – making brooder with cardboard boxes or plastic bins.
Q: Can I use a glass tank for a chick brooder?
Glass tanks can work for temporary brooding, but ventilation is crucial. Not enough ventilation can lead to ammonia build-up and chick health problems.
Final Word
Building your chick brooder is a smart and affordable way to ensure faster growth. Just pick the right materials and keep an eye on the temperature, space, and cleanliness. Whether you use an old container or build a wooden frame, the goal is a cozy home. It’s until they’re big enough for the coop!
Doing it yourself or a DIY project not only saves money but also lets you have a new experience. If you find it difficult, opt for a pre-build brooder for chicks.