Building Your Own Portable Chicken Coop: A Comprehensive Guide

Have you ever wondered about making a portable chicken coop plans? Well, it’s a win-win move as movable coops offer convenience and flexibility!
But first, you need to know the portable chicken coop plans. Well, they’re equipped with essential features like optimal size, ventilation, nesting boxes, and roosting bars. You’ll need wood, hardware, nesting box materials, roofing material, and predator-proof wire mesh. Then, you move to step-by-step instructions! It’s from framing the coop to adding other materials. Done!
Want to know the building steps for a portable chicken coop? Let’s dive in!
Table of Contents
5 Things to Know for A Portable Chicken Coop Plans

Portable chicken coops offer flexibility and healthier soil for your feathered friends. Here’s a detailed guide to plan your perfect coop.
1. Essential Features for Portable Chicken Coop
Aim for 4 sq ft per chicken inside the coop and 8 sq ft per chicken in the run for a comfortable living space. Install vents on the high and low points of the coop for air circulation. Consider adjustable insulation based on your climate (more for colder regions).
Provide 1 nesting box for every 3-4 hens. Make them private, easily accessible from outside for egg collection, and line them with soft bedding. Include dim lighting inside to encourage egg-laying.
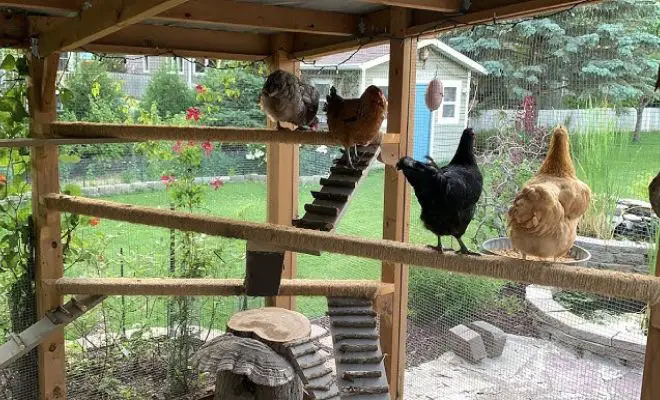
Install elevated roosting bars (around 10-12 inches apart) inside the coop for chickens to perch and sleep comfortably.
2. Materials to Gather for Portable Chicken Coop
Choose weather-treated lumber of the dimensions specified in your chosen plan. Common options include pressure-treated pine or cedar.
Hinges, locks, wheels, coop wire mesh (galvanized hardware cloth is strongest), and fasteners like screws and nails as per your plan.
Wood, plywood, or even recycled materials like buckets can be used following your coop plan’s specifications. Also, opt for weather-resistant roofing like asphalt shingles or metal roofing for durability.
I would say using galvanized hardware cloth for strong, predator-proof coop walls and the run enclosure.
3. Step-by-Step Instructions (Building Your Dream Coop)

Construct a sturdy frame using your chosen wood and pre-cut lumber pieces, following your plan and securing them with appropriate fasteners.
Build a solid floor using plywood or lumber, ensuring a slight slope for proper drainage to avoid moisture build-up.
Attach pre-cut wall panels and roof sections to the frame according to your plan. Secure them with appropriate fasteners for stability. Mount secure nesting boxes inside the coop, ensuring easy access from outside for collecting eggs.
Much better if you line them with soft bedding. Plus, consider adding dim lighting for a comfortable egg-laying environment.
On the other hand, attach a spacious, well-ventilated run using predator-proof wire mesh. Ensure proper ventilation throughout the run for fresh air circulation.
Wait! Don’t forget to install wheels or handles based on your chosen portability method. Consider the size and weight of your coop when selecting wheels for smooth movement.
4. Tips & Considerations
Choose a well-drained area with some shade and protection from wind and rain for year-round comfort. Ensure proper airflow throughout the coop to prevent moisture build-up and ammonia fumes that can harm your chickens.
Use a strong, secure coop with hardware cloth, and consider additional fencing around the perimeter for extra security.
Regularly clean the coop with a disinfectant solution to maintain good hygiene and prevent the spread of diseases. Remove droppings and replace bedding frequently.
5. Customization Ideas (Make it Your Own)
Here I mentioned some of the customized ideas for portable coops for chickens. Check them out!
- Decorative Touches: Personalize your coop with paint, and colorful nesting box designs, or even add chicken toys inside the run for entertainment.
- Automatic Door Openers: Install timers or light sensors for automated coop access in the morning and evening, allowing your chickens freedom while maintaining predator protection during the night.
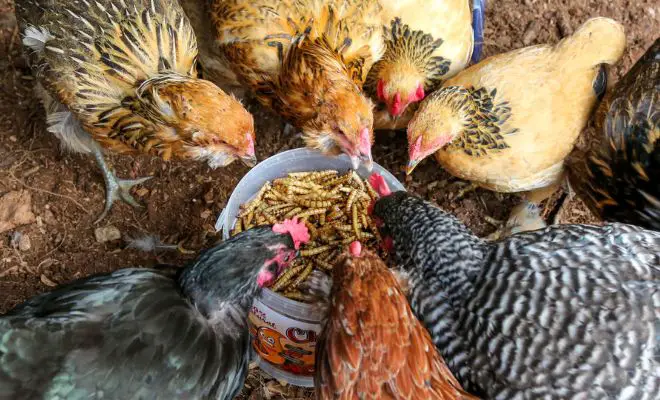
- Integrated Feeders & Waterers: Mount feeders and waterers inside the coop for easy access and refilling, ensuring a constant supply of food and water for your feathered friends.
- Solar-Powered Lighting: Add solar lights for nighttime illumination inside the coop. This provides a natural light source and reduces reliance on electricity.
Related Reads:
In a hurry to make one portable coop? See the video to get ideas!
FAQs
Have a look at the following Q&A section about a portable simple chicken coop.
Q. I’m new to chickens. Are portable coops a good option for beginners?
Absolutely! Portable coops are simpler to build and move. It allows you to experiment with coop placement in your yard – perfect for beginners.
Q. How often should I move my portable coop?
Move your coop every few weeks to a month. This provides fresh patches for your chickens to peck and prevents overgrazing in one area.
Q. What about predators when using a portable coop?
For predator protection, choose a secure coop with hardware cloth. Also, consider adding perimeter fencing when your coop is stationary
Bottom Line
Now that you’ve got the lowdown on building your own portable chicken coop. So, it’s time to roll up your sleeves and get clucking! With careful planning, you can create a cozy and secure home for the chickens with the flexibility of a movable coop.
Remember, each coop is as unique as its builder, so don’t be afraid with your personalized touches and customizations. Whether you’re a seasoned DIY enthusiast or just starting out with chickens, you can make it! Just follow the guides I included.